
Why Pre-Use Inspection Is Non-Negotiable
Abrasive wheels operate at peripheral speeds of 70-100 m/s. At these speeds, a wheel fracture releases fragments with kinetic energy equivalent to a rifle projectile. Pre-use inspection - the "ring test" and visual check - is mandated by EN 12413 and is required practice under most industrial safety management systems.
Step 1: Check Wheel Storage History
Before mounting, verify:
- ◯ Wheel is within its shelf life (max 3 years from manufacture date for resinoid bonded)
- ◯ Wheel has been stored upright or flat, not under heavy weight
- ◯ Wheel has not been exposed to water, solvents, or extreme temperatures
- ◯ Packaging shows no signs of damage in transit
Step 2: Visual Inspection
With the wheel in hand, inspect:
- ◯ No visible cracks on the face, edge, or bore
- ◯ No chips, notches, or deep scratches on the disc face
- ◯ Bore is clean and undamaged - no cracks radiating from the bore
- ◯ Wheel is not warped or oval (place flat on a surface)
- ◯ Max speed marking is clearly legible
- ◯ Specification matches the machine requirement
Step 3: The Ring Test
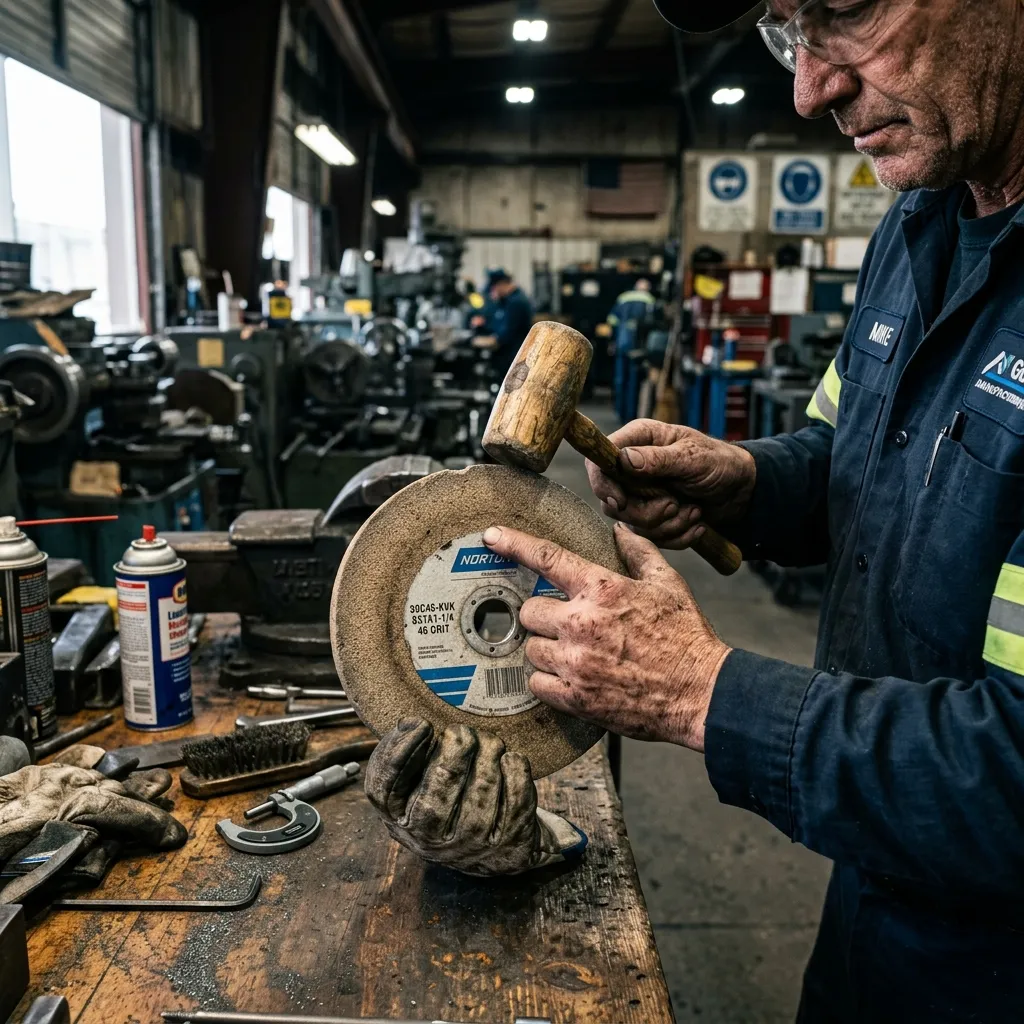
The ring test detects internal cracks that are not visible externally:
- Suspend the wheel by inserting a finger through the bore (or on a pin for large wheels)
- Tap the wheel gently with a wooden mallet or the handle of a screwdriver
- A healthy wheel produces a clear, ringing tone
- A cracked wheel produces a dull thud - discard immediately
Note: Heavily loaded wheels or wheels with cores (segments, plates) cannot be ring-tested. Visual inspection is the only test for these types.
Step 4: Check Machine Compatibility
- ◯ Machine speed does not exceed wheel's maximum rated speed (m/s or RPM)
- ◯ Flange diameter matches wheel specification (minimum 1/3 of wheel diameter)
- ◯ Guard is fitted and covers at least 180 degrees
- ◯ Guard fastening screws are secure
Step 5: Mount and Run-Up Test
- Mount the wheel with the label facing out (the label covers any manufacturing defect on that face)
- Apply flange and tighten nut - hand tight, then one full turn with spanner
- Do not overtighten - excess torque can crack the wheel at the bore
- After mounting, run the machine at full speed for at least 60 seconds before applying to work
- Stand to the side during run-up - never in front of the wheel
When to Discard a Wheel
Discard immediately if:
- Ring test produces a dull tone
- Any visible crack is detected, even hairline
- Wheel has been dropped (even from low height onto concrete)
- Wheel has been exposed to water or solvents
- Wheel is past its shelf life date
- Wheel shows uneven wear or loading
All Apidor wheels supplied by Pooja Abrasives include safety information in the packaging. Contact us for technical data sheets and safety documentation.